Wednesday, 19 November 2014

The Effect of Sound in Animation

"Sound effects play an important role in conveying action. Music helps Express emotion" Michael Geiser

As michael Geiser says here in this quote, Sound is such an important part of an animation. He states that music has the power to control the general emotion and feeling of parts of an animation or video. A good animation should take you on a journey, and keep you interested throughout. The sound effects and music has power to shape how your time is spent whilst on that journey. Simply choosing the right music and sound effects to accompany scenes in an animation can shape the success and quality of that animation. After all, Sound is one of five of our senses and needs to be engaged.

Just the use of music can create an image in a person's mind. It encourages you to use your imagination and has an impact on the way we watch something, the impact it has upon the way we watch something . If you were to watch a video twice: one time with a certain soundtrack music and use of sound effects, but then the second time with a completely opposing choice of soundtrack music and use of sound effects it could cause one to view that video completely differently and come away from it feeling completely different.

Catchy sound effects or music are great at encouraging people to remember a video or animation. This proves extremely useful for advertisers selling a product or an idea; especially if the words of the product, what the product does, or company name is held within the tune.

"The right music can help your animation flow, and sound effects can give your work a solid feeling that adds to the illusion of life." Mark Simon

What Mark Simon states here about sound effects is very true. Especially through stop-motion animation when your aim is to convince the audience that the characters on the set are alive and moving. It really helps to increase the audiences belief that they really are doing what they're doing by themselves.

Sound in films & animations:

Dialogue
Ambient or natural sound
Narration
Sound effects
Soundtrack

These are all important elements that is needed and will increase how real looking an animation is; as well as accompanyments which will make the story run smoothly and make sense. Even down to the smallest detail of the quiestest hiss during a peice of dialogue, or instead of complete silence (unless you want complete silence) can improve how believable it is.

"A truth whispered among animators is that 70% of a show's impact comes from the sound track" Michel Dougherty

Wednesday, 29 October 2014

Creating Camera-less Animation


This week during our educational futures seminar we were looking at different types of non-camera made animations and how they manage to make an image move. We looked at different methods such as: Thaumatropes, Phenakistoscopes, flipbooks, etc.


We all then got assigned a type of non-camera made animation, and got set a task to make one for ourselves. I got assigned the Thaumatrope. These are the steps in which I went through to make my Thaumatrope.


 Step 1... 

You will need to collect all these different bits of equipment, as you will need them to create your Thaumatrope
Step 2...

The first thing you will need to do is (using your scissors) cut your piece of paper into a circular shape like so.
Step 3...

The next thing is (using your pin, or another sharp object) make a small hole in 2 sides of your circle (these must be symmetrical to eachother).
Step 4...

Next, using the string you have (it is best they are the both the same/similar lengths) push both bits of string through your two holes and tie a hole (as shown) in the end to stop it pulling out.
Step 5...

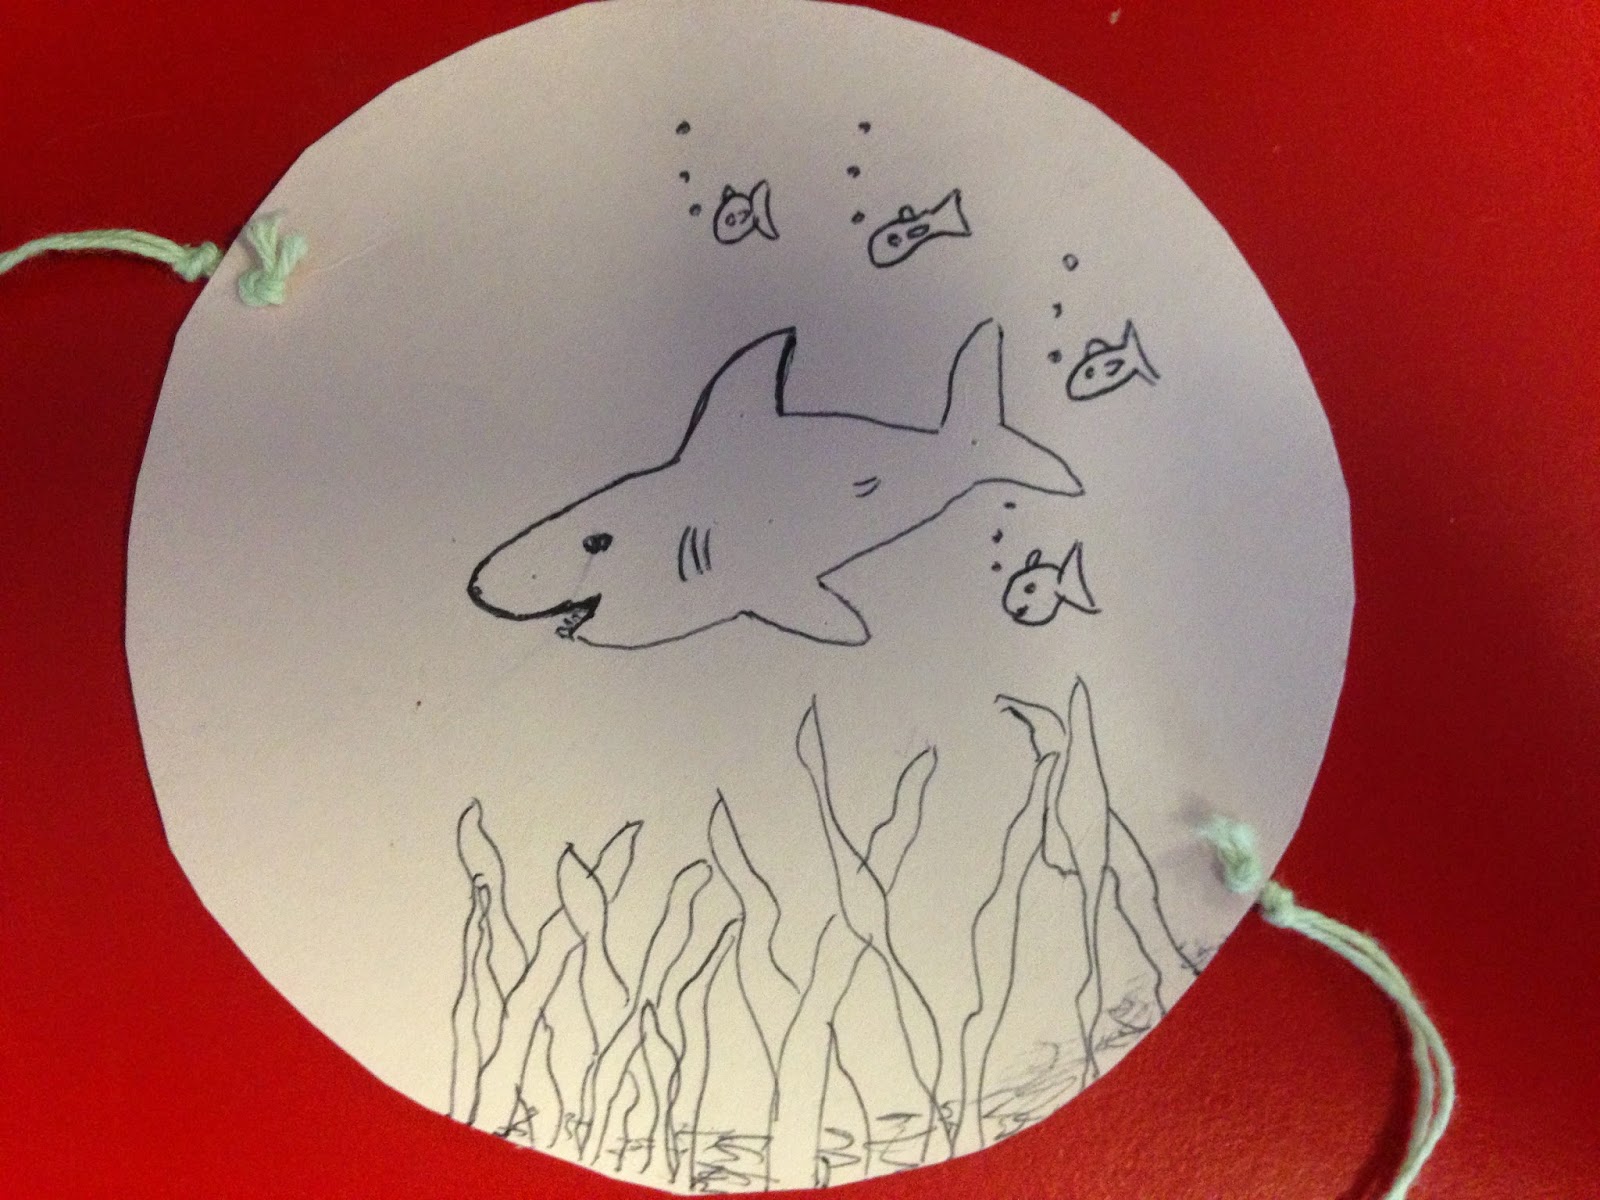
Now your Thaumatrope is successfully completed it is time to create your animation. Remember these two images need to be slightly different to show a change between the two pictures.


        The idea of this Thaumatrope, as you can see by my step by step pictures, is that you have a circular piece of paper, card or other material and create on one side a simple creative picture. On the other side you will have to create another simple creative picture, normally the same picture but show a movement or change. You will then need to pierce small holes in either side of the circle, insert string or an elastic band and then whilst holding both sides of the bands or string spin round your circle and your image will become animated!!


After successfully creating my Thaumatrope, we were all placed into pairs and set a task to make a more complex camera-less animation. We were set to make the Phenakistoscope. These are the steps in which we went through to make our Phenakistoscope:

Step 1...
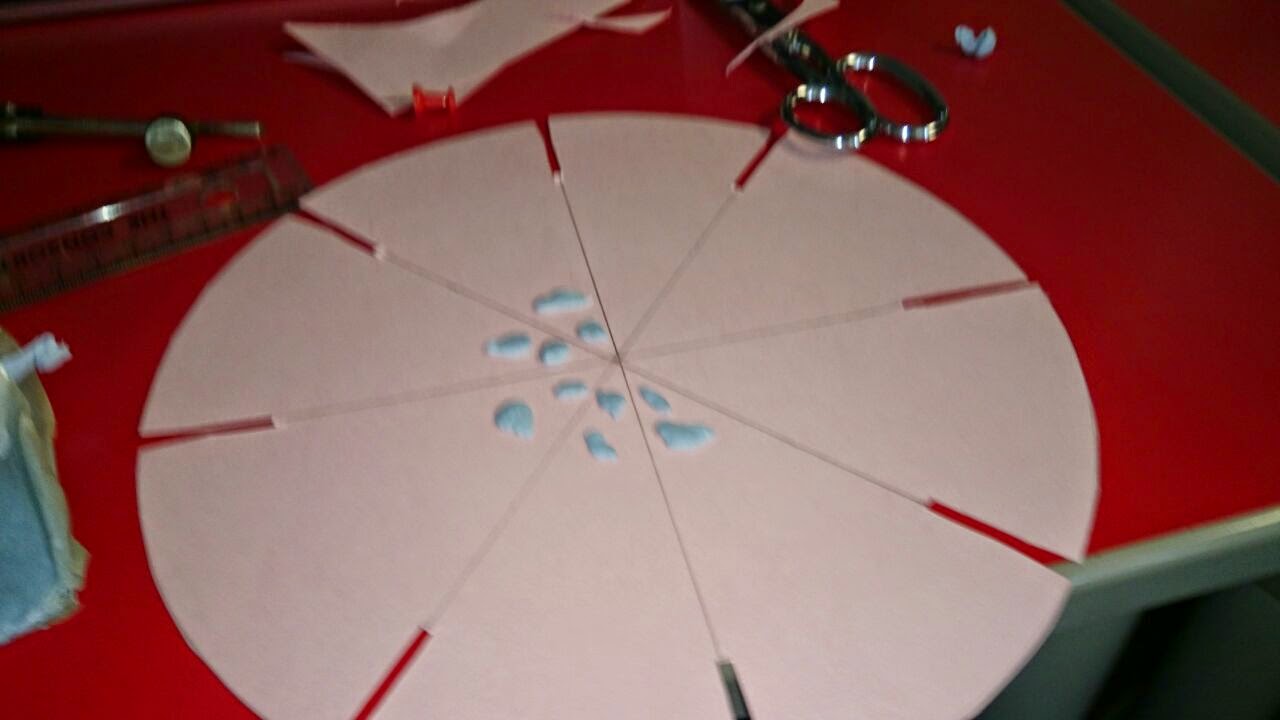
Again you will need to collect the same equipment as you needed for your Thaumatrope, except you will also need a ruler and bluetack or something similar. Firstly you will need to create a circular shape double the size of the one you needed for your thaumatrope. Split it into equal segments as shown above (the amount of segments depends upon how many animations you want to create). Then cut evenly sized 1 inch wide by 3 inch long slits in the end of each segment.
Step 2...
Next you will need to create a smaller size circle, approximately half the size of the first one you have just created. Likewise you will need to split it into segments identical to the first circle. This will be the circle you will create your animation upon.
 Step 3...
So now it is time to create your animation! You will need to draw one animation that you intend to keep. This animation should then change/move slightly from each segment. The less movement between each segment the better, as it will make the animation much smoother (However not enough and it won't appear to really move).
 Step 4...
Once you have created your animation circle, you will need to (using your bluetack) stick it onto your circle you have created with the slits in (make sure the middle of both the circles are in line with eachother, as shown above). Next you will then need to push your thumbtack through the middle of both circles.
 Step 5...
The idea of this animation method is that you will hold it up in front of a mirror, look through the slits from behind (so the animation is facing the mirror), and spin the Phenakistoscope around by just holding the thumbtack. You need to make sure the thumbtack is not fixed in and lose enough to spin around. Then you'll need to (as shown above) place a small piece of blue tack ontop of the sharp end of the thumbtack. This will mean the thumbtack won't fall out, but also eliminates any chance of hurting yourself too!

As you can see by our step to step pictures it is the same concept as the Thaumatrope, except there are many more images providing a longer but more fluid animation. Although this method would need a lot of tweaking and perfecting as we found it was hard to view the animation through the slits (This is the reason why we made our slits slightly larger in the later pictures).

These methods are much easier to do than the other camera requiring methods. Firstly because the equipment required is much easier and cheaper to use, and secondly they take a lot less time to create but still encourage the same development of creativity and use of imagination, and are just as fun! I believe these methods would work really as an activity for schools.


So there you have it! Two types of Camera-less animation. Try them yourself, or investigate some other types and try them like for example, the flipbook. I’m sure you'll be surprised how affective/fun they can be.